Hardware example (Arduino)
|
|
|


The following pictures show the schematics and built-up for a 4 temperature and 2 fan control channels device using an Arduino Nano or Uno.
The temperature sensors are connected to Arduino pins A0..A3. Using these analog pins for the DS18B20 is not neccessary, you can use any other digital pin like D6 as well.
For each DS18B20 channel, one pull-up resistor (R5, 4,7k) is needed.
Fan control for the 4-pin pwm fan is done with resistor R1 (4,7k) and transistor T1 (BC547, any compatible NPN type will do).
For safely reading the tach signal from the fan, the resistors R2..R4 (2x 10k, 1x 6,2k) are used.
The first fan uses Arduino pins D2 and D9.
If you need a second fan, double the parts and connect the second fan circuit to Arduino pins D3 and D10.
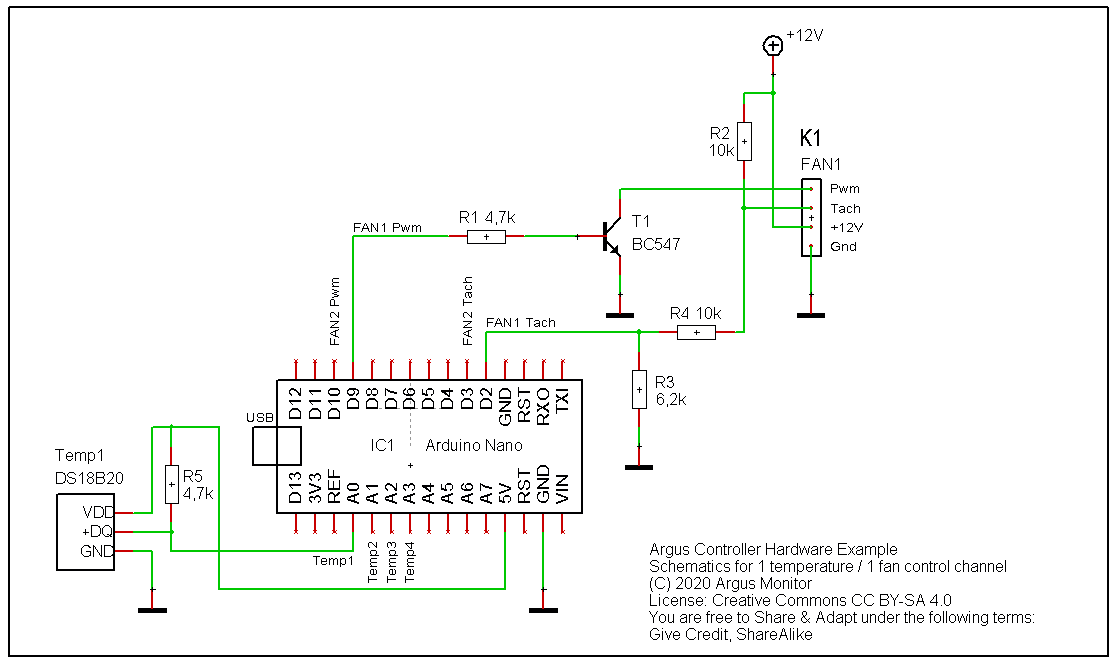
Argus Controller, schematics example with Arduino Nano, 1 temperature channel, 1 fan control channel
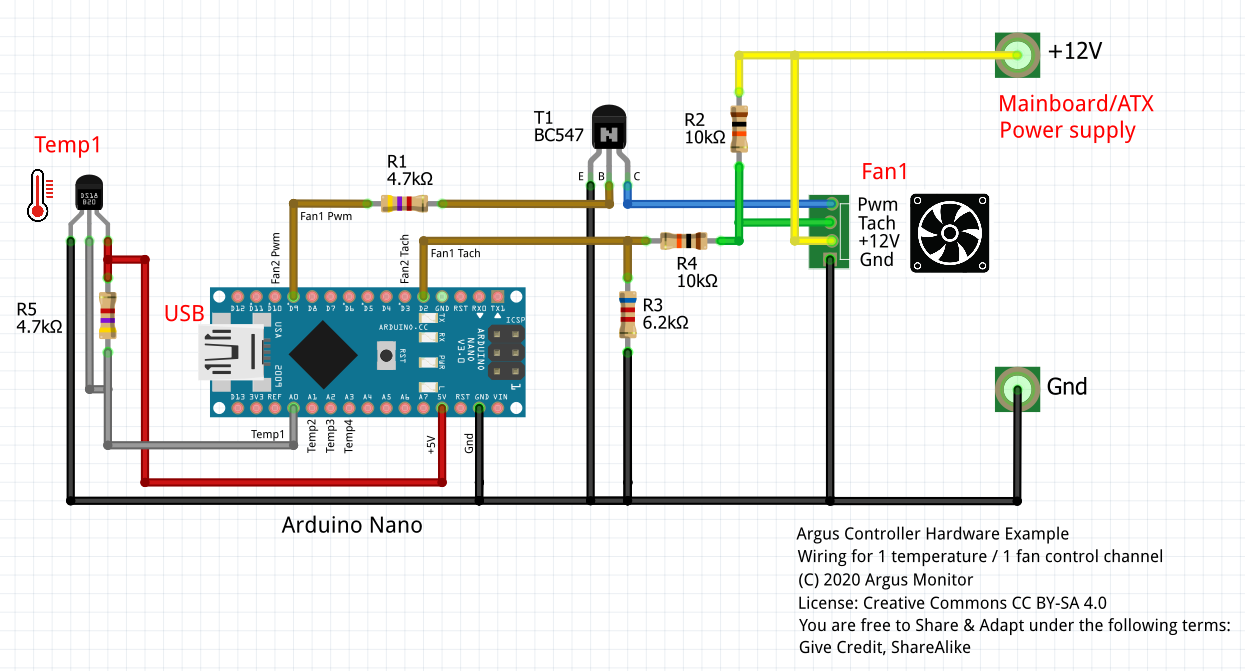
Argus Controller, Wiring example with Arduino Nano, 1 temperature channel, 1 fan control channel
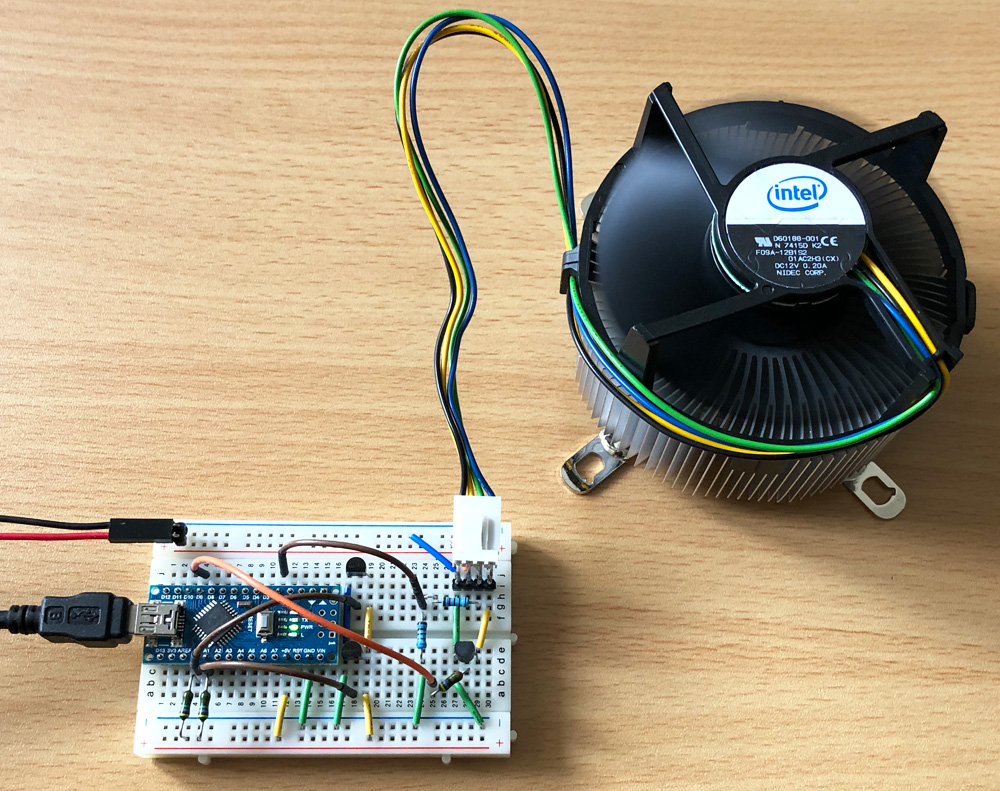
Argus Controller, prototype set-up with Arduino Nano

Argus Controller, prototype set-up with Arduino Nano
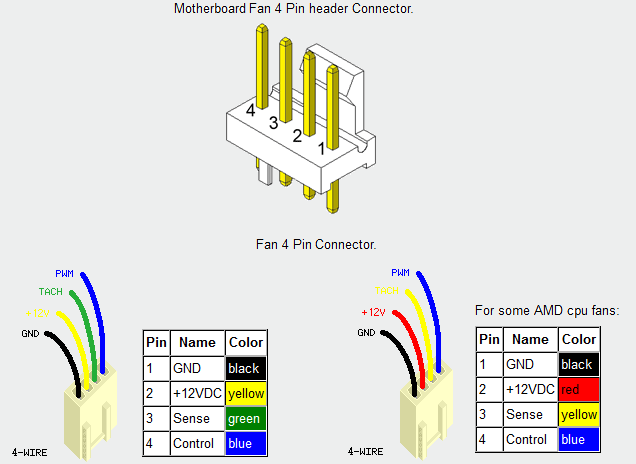
Motherboard Fan 4-Pin header connector